Atlas Dashboard
The Atlas Dashboard is your central hub for managing the datasets, members, API access, and settings for your Atlas organization. It consists of the following sections:
- Datasets: View and manage all datasets in your organization
- Members: Manage organization membership and permission levels
- API Keys: Create and manage API keys for programmatic access
- Settings: View and configure organization-level platform usage and billing settings
Visit your Atlas dashboard at https://atlas.nomic.ai/data.

Datasets
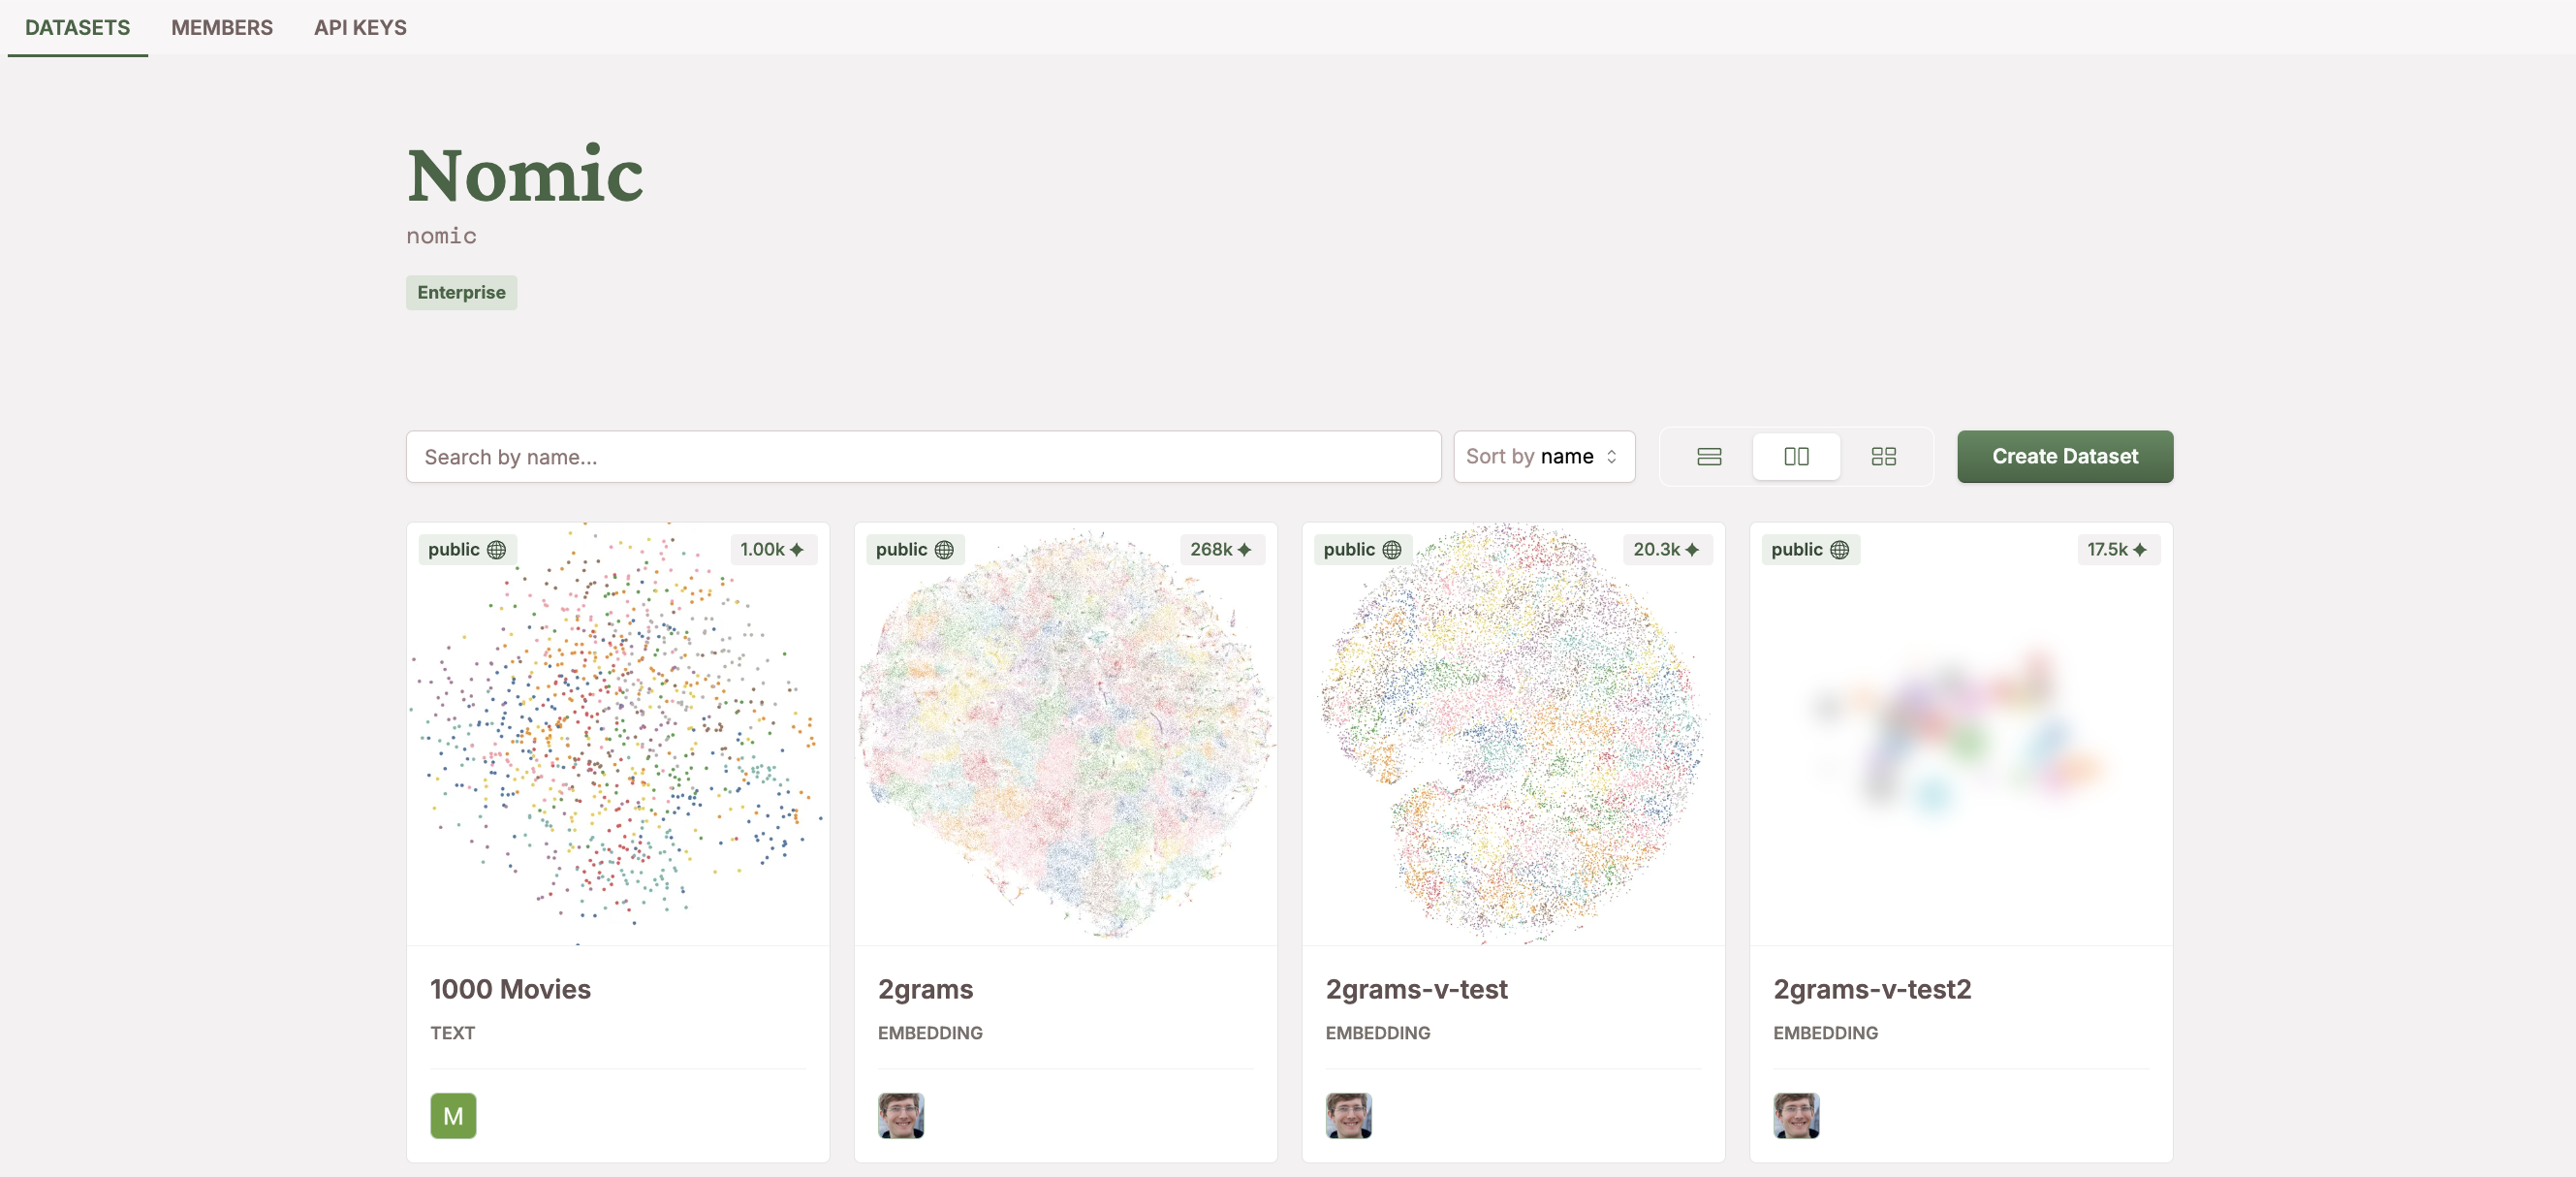
The Datasets tab provides a gallery of all the datasets in your organization. Each dataset is represented by a card that displays a preview of the Atlas data map corresponding to the dataset, its name, and metadata including its and size and visibility (public or private).
You can search for specific datasets by name or sort the gallery alphabetically, by creation date, or by dataset size.
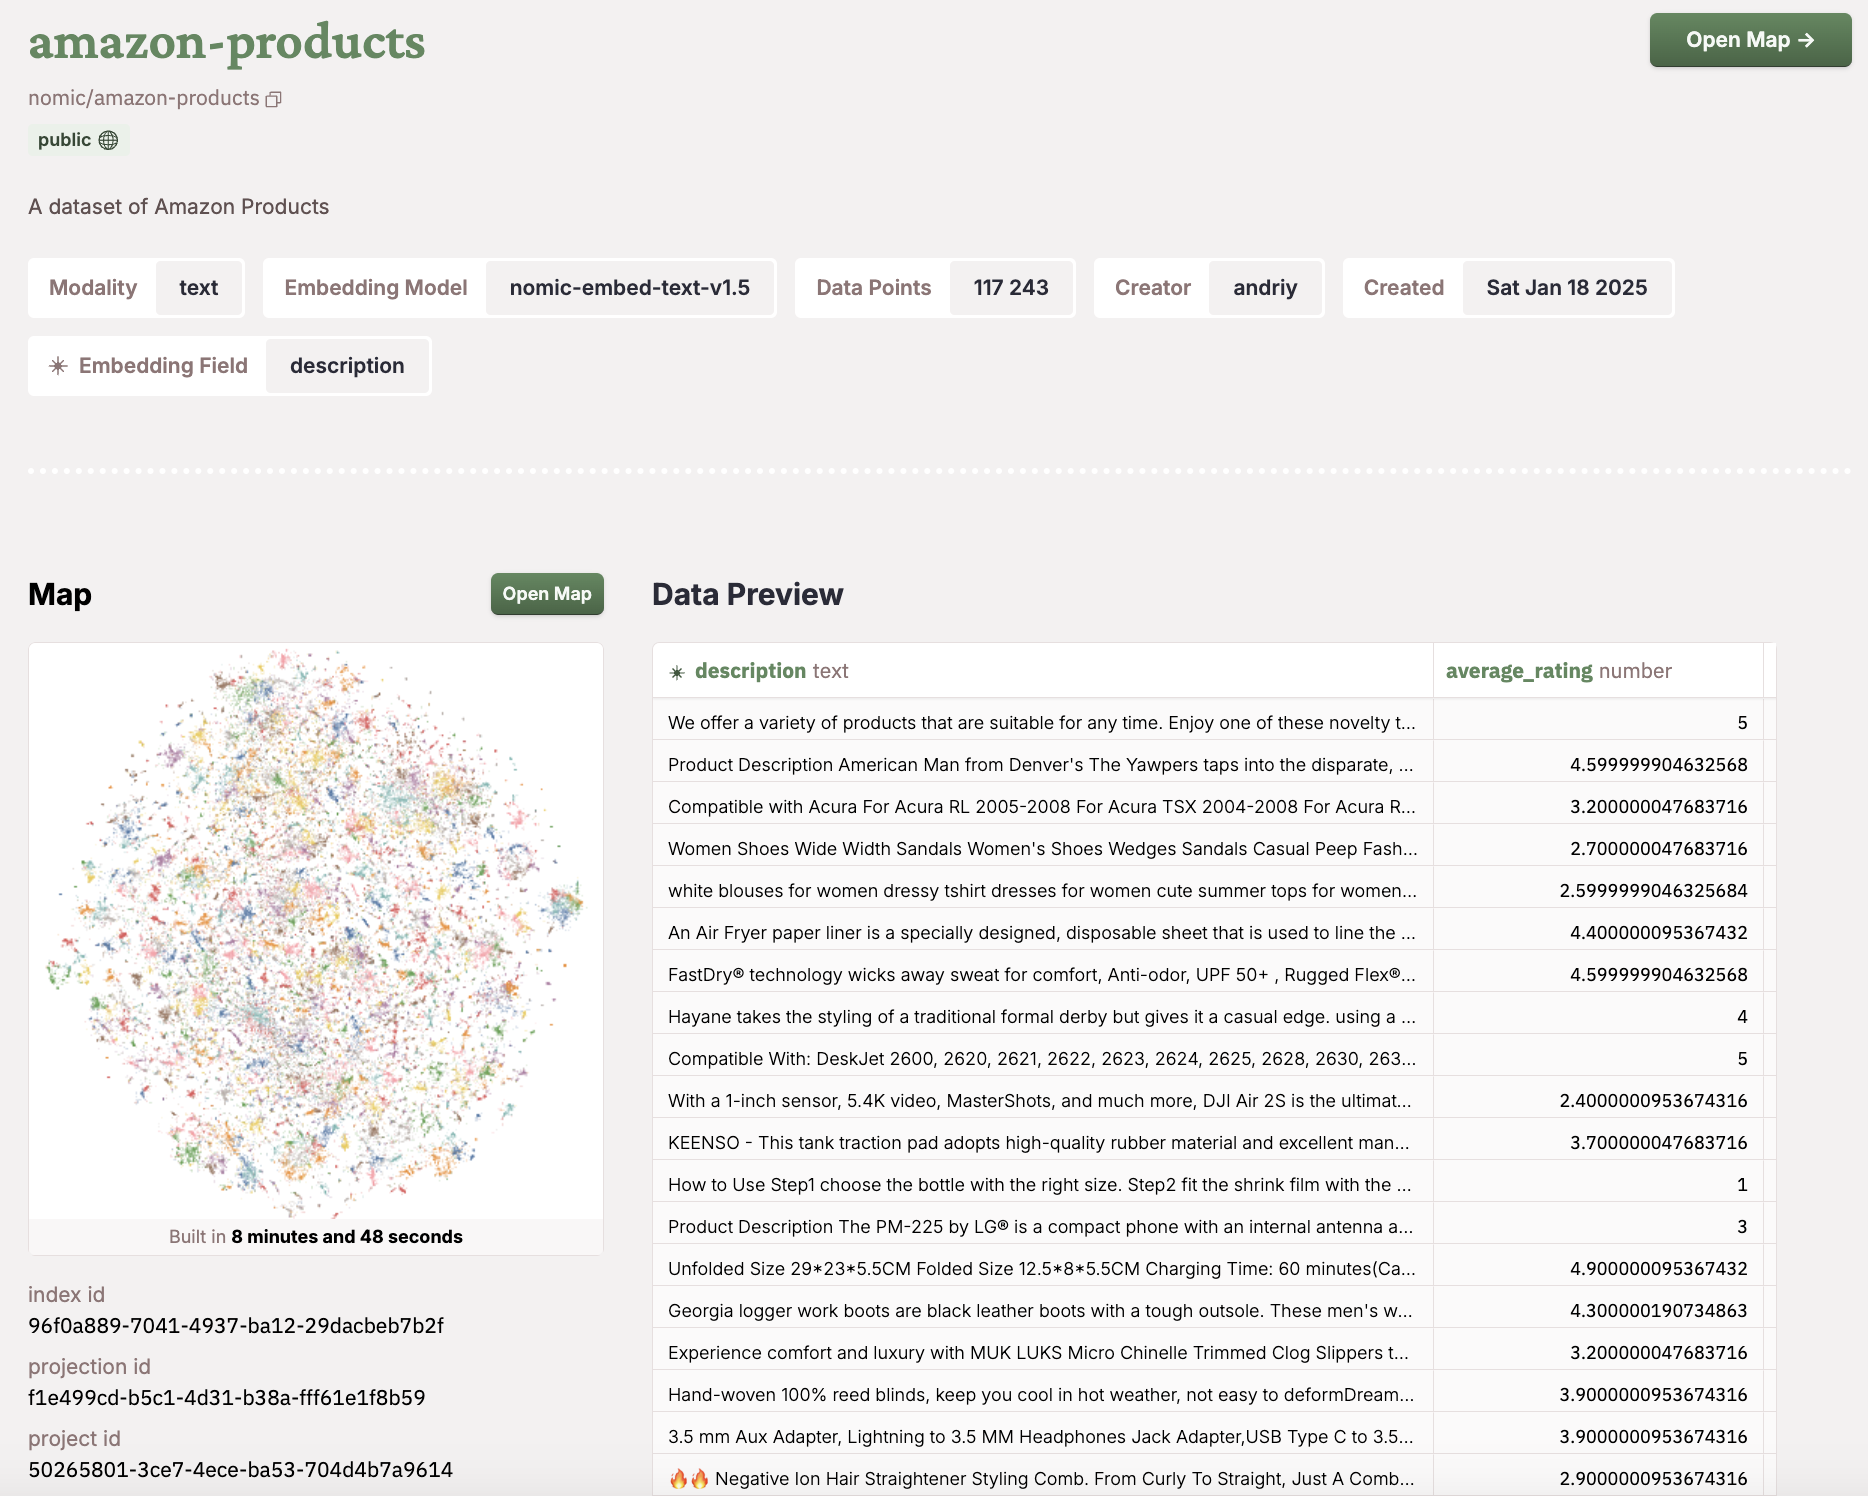
When you select a dataset by clicking its card, you'll be taken to a dedicated dataset page with two sections:
Dataset Preview
The preview section offers a quick way to see and understand your dataset.
You can scroll through rows of the dataset, inspect which columns are present, and see metadata from its upload to Atlas (such as the date the dataset was created and which column from the data was used as the Embedding Field, which determines how the points get arranged in the Atlas data map).

Dataset Settings
The settings section lets you control your dataset's name, description, and access permissions. Additionally, this is where you have the option to delete your dataset.
For users on Business & Enterprise tiers, you can give dataset-specific access permissions:
- Add or remove individual members from specific datasets
- Implement precise access control to determine who can view or edit particular datasets within your organization
- Dataset-level permissions are independent from organization-wide settings
Organization Members
From the Members tab, you can:
- Add new members to your organization
- Set permission levels (Owner, Admin, Editor, Viewer, or Guest)
- Remove members from your organization
For detailed information about permission levels and access control, see our Security and RBAC documentation.
Adding members to your Atlas organization is only available for users in the Business and Enterprise plans.
API Keys
The API Keys tab provides functionality to manage API access to Atlas. You can generate new API keys for your applications and delete keys that are no longer needed.
API keys provide secure programmatic access to Atlas, enabling you to interact with the platform's core functionality through code. With a valid API key, you can fetch existing datasets from your Atlas organization, upload new datasets programmatically, and use the Nomic Embed API to generate embeddings for your data.
Organization Settings
Organization Usage & Limits
The Settings tab provides visibility into your organization's platform and API usage, including:
- Dataset Storage: Track the total storage used by your datasets, including embedding storage
- Text Tokens: Monitor the amount of text processed through dataset embedding creation or API usage
- Images: View the number of images processed through dataset embedding creation or API usage
Each metric shows both current usage and total allocation limits for your plan.
Upgrade Organization Tier
In the settings page you can upgrade your Atlas organization to the Tier, Pro, or Enterprise plan.
Upgrading your Atlas tier gives you acceess to increased data storage and API usage limits, collaboration on your maps, dataset & organization role-based access control, and more.
You can learn more about Atlas pricing tiers here on the Atlas website.